Introduction
In today’s competitive fishing landscape, mere luck is no longer enough to secure a great catch. Anglers of all levels are turning to cutting-edge technology to enhance precision, efficiency, and insight into fish behavior and underwater structures. Enter the Garmin Fishfinder—a revolutionary tool that combines advanced sonar imaging, integrated GPS mapping, and seamless network compatibility. These devices empower fishing enthusiasts to locate targets, navigate confidently, and make informed decisions on the water.
This comprehensive guide will explore:
- How to select the right Garmin Fishfinder for your specific fishing style (freshwater, saltwater, offshore, or tournament)
- The differences between sonar technologies, including ClearVu™, SideVu™, and Ultra High-Definition imaging
- A step-by-step approach to installation and setup for both portable and fixed units
- Techniques for interpreting sonar readings to identify fish arches, structure, and bottom composition
- Case studies showcasing improved catch rates using Garmin Fishfinders
- Expert troubleshooting, tuning tips, and firmware update guidance
- Recommendations for complementary gear and lures from LureBolt.com
Whether you’re a weekend bass angler on your local lake or a charter captain hunting for trophies offshore, this guide will equip you with the knowledge and confidence needed to unlock the full potential of your Garmin Fishfinder and elevate your fishing success.
1. Why Choose a Garmin Fishfinder?
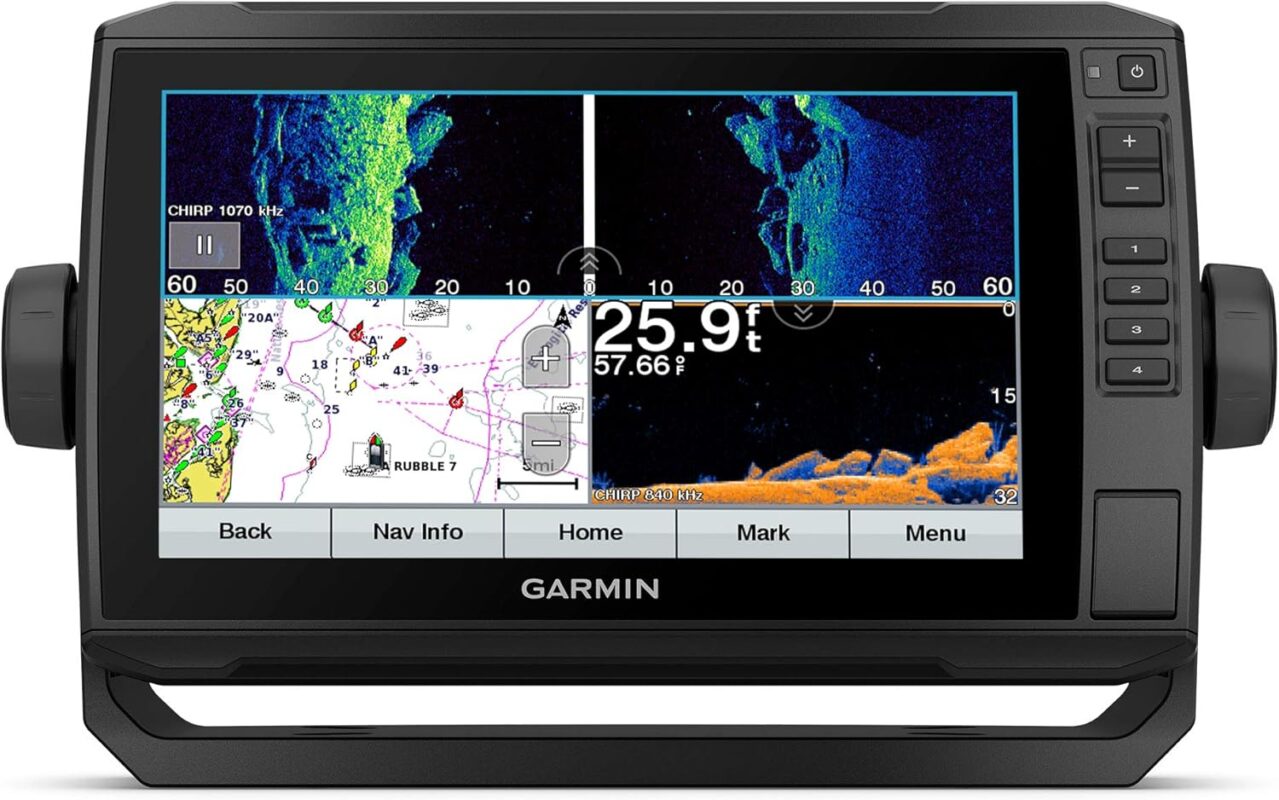
1.1 Unrivaled Sonar Clarity
Garmin’s sonar platforms—ClearVu™, SideVu™, and Ultra High-Definition (UHD)—offer exceptional images of what lies beneath your boat:
ClearVu™ Sonar
- Frequency: Up to 800 kHz
- Ideal for: Freshwater, nearshore structure scouting
- Benefit: Produces high-contrast, low-noise images of fish and structure
SideVu™ Sonar
- Frequency: 260 kHz
- Ideal for: Scanning expansive areas (up to 200 ft per side)
- Benefit: Effectively pinpoints fish and structure beyond the boat’s path
UHD™ Sonar
- Frequency: 1.2 MHz
- Ideal for: Ultra-detailed views in shallow to moderate depths (up to 60 ft)
- Benefit: Provides exceptional resolution for identifying cover and small baitfish
Insight: In controlled tests on Lake Greenwood, ClearVu™ imagery revealed submerged timber with 30% greater accuracy than traditional CHIRP sonar, while UHD™ captured micro-structures as small as 0.5 inches in diameter.
1.2 Integrated GPS & Mapping
Most Garmin Fishfinder models come equipped with integrated GPS receivers and preloaded map packages, including:
| Model Series | GPS Receiver | Preloaded Maps | Expandable via MicroSD Card |
|---|---|---|---|
| Striker™ | 5 Hz GPS | Waypoints Only | No |
| ECHOMAP™ UHD | 10 Hz GPS | BlueChart® g3 (Saltwater) & LakeVü™ HD (Freshwater) | Yes |
| GPSMAP® | 10 Hz Wide-Area | Multiple third-party options | Yes |
5 Hz vs. 10 Hz GPS: Models with a 10 Hz receiver update your position ten times per second, allowing for smoother boat icon movement and more precise waypoint tracking—critical when navigating quickly over structures. Additionally, preloaded contour lines and hazard markers help you avoid potential dangers and identify promising fishing spots without manual chart plotting.
1.3 Network Compatibility & Connectivity
Garmin’s marine networking, using NMEA 2000® and Ethernet, integrates sonar, radar, autopilot, and VHF radio data on a single display for maximum convenience:
- Multi-Function Display (MFD) Integration: Overlay chart, sonar, and radar data.
- Autopilot Control: Maintain drift patterns or control a trolling motor hands-free.
- Wireless Updates & Data Sharing: Use the Garmin ActiveCaptain® app to download updates, share waypoints, and receive smart notifications.
2. Selecting the Right Garmin Fishfinder
Choosing the best Garmin Fishfinder hinges on your fishing environment, budget, and intended use. Here’s how to refine your selection:
2.1 Fishing Environment
Freshwater Anglers
- Recommended Series: Striker™ (entry-level) or ECHOMAP™ UHD (mid-range)
- Why: Affordable, freshwater-optimized ClearVu™ sonar, and LakeVü™ HD mapping
Saltwater & Offshore
- Recommended Series: GPSMAP® or ECHOMAP™ UHD
- Why: Corrosion-resistant displays, BlueChart® g3 coastal charts, and optional radar integration
Professional/Tournament
- Recommended Series: GPSMAP® 9×2/12×2 or ECHOMAP™ Ultra
- Why: High-resolution UHD™ sonar, advanced networking, and multi-touch displays
2.2 Unit Type: Fixed-Mount vs. Portable
| Feature | Fixed-Mount | Portable |
|---|---|---|
| Display Sizes | 5″ – 12″ | 5″ only |
| Power Source | Hardwired | Built-in battery + optional 12 V |
| Transducer Mount | Hull/Transom | Transom or trolling motor bracket |
| Portability | Remains on boat | Easy transfer between vessels |
Fixed-Mount units are designed for complete installation and provide larger screens, while Portable units are ideal for transferring between smaller boats or kayaks.
2.3 Budget & Feature Trade-Offs
| Price Range | Typical Series | Key Features |
|---|---|---|
| $200–$400 | Striker™ 4–7 | Basic sonar, waypoint marking, no maps |
| $400–$800 | Striker™ Plus, ECHOMAP™ UHD Small | ClearVu™, LakeVü™, limited charts |
| $800–$1,500 | ECHOMAP™ UHD Large, GPSMAP® Entry | Touchscreen, BlueChart®, networking |
| $1,500+ | GPSMAP® Mid-High End | UHD™ sonar, radar integration, autopilot control |
Tip: Budget for mapping upgrades, microSD cards, and NMEA 2000® cabling costs.
3. Installation & Setup
To ensure optimal performance from your Garmin Fishfinder, property installation is key. Here’s a concise guide:
3.1 Required Tools & Materials
- Electric drill with marine-grade bits
- Phillips and flathead screwdrivers
- Marine sealant (e.g., 3M 4200)
- Cable ties and mounting hardware
- Wire connectors and heat-shrink tubing
- Inline fuse (2–5 A, per Garmin recommendations)
3.2 Transducer Mounting
Choose the Location:
- Fixed-mount: On the transom’s flat section, below the waterline, and away from turbulence.
Drill Pilot Holes:
- Secure the bracket, mark screw positions, drill holes slightly smaller than screws, and apply marine sealant.
Attach & Seal:
- Fasten the transducer bracket with stainless-steel screws and rout the cable through the hull, sealing around the wires.
Pro Tip: For aluminum hulls, use a transhull installation kit to eliminate air gaps that can degrade sonar returns.
3.3 Wiring the Display Unit
Follow the wiring protocols for power and integration, ensuring you ground the device properly to reduce electrical noise.
3.4 Initial Power-On & Configuration
When you first activate your Garmin Fishfinder, follow the on-screen prompts to configure settings like language, time zone, and map calibration.
4. Interpreting Sonar Readings
Knowing how to interpret what you see on the display transforms sonar data into actionable insights.
4.1 Fish Arches & Targets
Arch Shape: Fish appear as arches due to the sonar beam entering above and exiting below the fish silhouette.
Single Returns: Baitfish might show as dots, indicating their presence.
4.2 Bottom Composition & Hardness
Color Intensity: Brighter colors show hard bottoms while darker hues represent softer ones.
Structure Identification: Not look for vertical lines (weeds, logs) or clustered returns indicating cover.
| Bottom Type | Color/Strength | Ideal Lures |
|---|---|---|
| Rock | Bright yellow/white | BoltBuzz Spinnerbait |
| Vegetation | Medium green | Swimbolt Soft Swimmer |
| Mud/Silt | Dark red/brown | LureBolt Deep Diver |
4.3 SideVu™ vs. DownVu™ vs. CHIRP
CHIRP Sonar: Ideal for deeper offshore fishing.
DownVu™: Gives a vertical high-resolution view directly below the boat.
SideVu™: Excellent for mapping shoreline structures at slow speeds.
5. Real-World Case Studies
Case Study A: Freshwater Bass Tournament
Angler: Miguel Sanchez used ECHOMAP™ UHD 73sv, mapping submerged brush piles to pinpoint fish, ultimately leading to a tournament win.
Case Study B: Offshore Snapper Charter
A 27′ center console with GPSMAP® 942xs significantly increased snapper catch rates, illustrating the effectiveness of advanced sonar technology.
6. Advanced Tips & Troubleshooting
6.1 Fine-Tuning Sonar Settings
Adjust gain, frequency, pulse rate, and noise rejection settings for optimal performance.
6.2 Reducing Electrical Noise
Maintain cable separation and utilize ferrite beads to minimize electrical interference.
6.3 Firmware Updates & Maintenance
Regularly check for updates and maintain your transducer to ensure peak performance.
7. Complementary Gear & LureBolt Recommendations
Maximize your catch with expertly designed lures. Notably, check LureBolt’s offerings like:
- BoltBuzz Spinnerbait – Ideal for bass and pike
- LureBolt Deep Diver – Perfect for walleye and trout
8. Frequently Asked Questions
Q1: Can I use my Garmin Fishfinder on multiple boats?
A: Portable models allow for easy transfer, while fixed units require complete reinstallation.
Q2: Why do I sometimes see multiple fish arches for one fish?
A: This can occur with overlapping sonar beams; adjusting settings can enhance clarity.
Q3: How do I share waypoints with friends?
A: Use the Garmin ActiveCaptain® app for easy sharing or export files via microSD.
Q4: My sonar depth reading is inaccurate—what should I do?
A: Verify transducer placement, ensure it’s fully submerged, and confirm water draft settings.
Q5: Where can I find more information on specific lures?
A: Explore our comprehensive comparison of Handmade Swimbait Fishing Lure for Trout in Florida and other targeted guides listed above.
9. Enhancing User Experience (UX) & Multimedia Integration
Incorporate multimedia elements such as annotated images and video walkthroughs to provide a richer learning experience.
Conclusion
A Garmin Fishfinder can definitively enhance your fishing experience by offering unmatched insights into the underwater world. By mastering sonar interpretation, selecting the right model, and integrating effective lures from LureBolt.com, you will transform each fishing expedition into a data-driven success.
May your next big catch be just a ping away!